storytelling activities for preschoolers: make a three-picture story with your 4-year-old
These storytelling activities for preschoolers help your child arrange three pictures into a beginning, middle and end. You will learn how to write down your child's words and make a simple story strip for retelling at home or in class.
In short
- Three picture cards give a young child a clear beginning, middle and end.
- An adult can write the child's spoken words without taking over the story.
- A short sentence, a few words or acted ideas can all be part of the story.
- The finished strip can be read, reordered and retold more than once.
What will your child make?
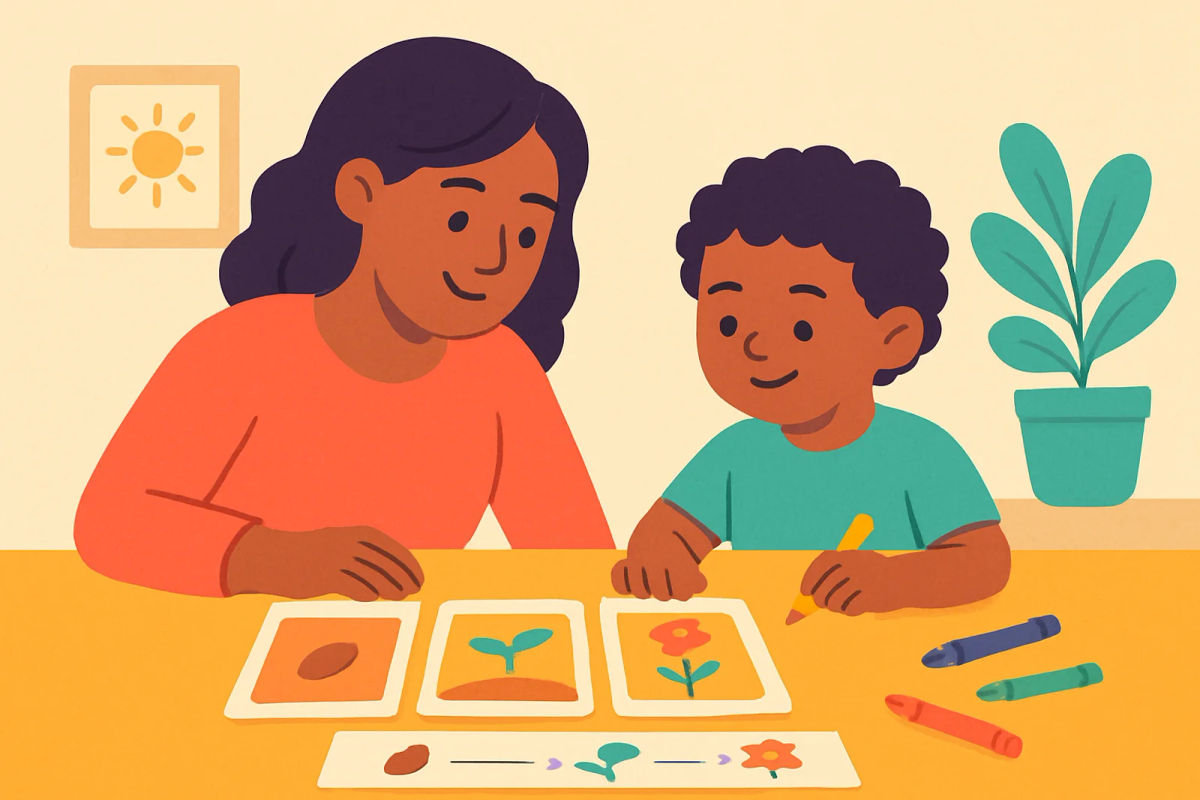
Your child will make a three-part story using one picture for the beginning, one for the middle and one for the end. The pictures should show actions that connect, rather than three unrelated objects. Your child tells you what is happening, and you write the words below each picture.
For example, the first picture may show a child finding a seed. The second may show the child putting it into soil and watering it. The third may show a flower growing in the same spot. Your child's version may include a bird, a helpful grandparent or a very big flower. Keep those details if they belong to the child's idea.
Set a short goal of telling the story aloud while you write. A four-year-old does not need to read or write the story independently yet. Point to the picture, listen carefully and record the meaning in clear words. The finished strip gives your child something to look at while retelling the story later. Keep the first attempt relaxed and brief, perhaps five to ten minutes.
What should you prepare before the activity?
Gather three small paper cards, a pencil or pen, and crayons if your child would like to draw. Choose pictures with clear actions, such as finding a lost ball, walking in the rain or making a fruit salad. You can draw simple pictures yourself, cut pictures from an old calendar or use safe family photographs.
Place the cards in a row from left to right. Leave some space below each card for the child's words. Before your child sits down, decide which direction the story will follow. If the cards can be moved easily, your child can later try putting them in a new order.
To make a story strip, print a simple page on A4 paper at Actual size, or 100 percent. You can also open a word processor and make three equal boxes across the page, with a writing line under each box. The files in the free printables library are PDFs, so check the paper setting before printing. Keep crayons nearby, but let speaking come before colouring if your child is eager to tell the story.
How can you tell the story together?
Begin with the first card. Ask, "Who is here?" and "What is happening?" Give your child time to look before asking again. Write the answer in the child's own words. If your child says, "Girl seed," you might write, "The girl finds a seed," while saying the sentence naturally aloud.
Move to the second card and ask what happened next. Help your child connect the pictures with words such as then, after that and next. You can say, "Then what did she do?" rather than supplying the whole answer. Write one short sentence or a few words under the card.
Use the third card to ask how the story ends and what the character feels. The child may say, "She is happy flower," and you can write, "She feels happy when she sees the flower." Read the full story back, pointing to each picture as you speak. Pause if your child wants to add a detail, then read it again from beginning to end.

Lumi's tips
- Lumi suggests keeping the first story short so your child has energy to tell it again.
- Let your child point or act when words are difficult, then write the idea you understand.
- Leave the cards on the table for a while so your child can revisit the story independently.
- Use familiar places, foods and routines when your child needs an easy starting point.
How do you make a free printable story strip?
You can make a story strip with paper and a ruler, or create one in a word processor before printing. The aim is simply to give each part of the story its own space.
- Draw three equal boxes across an A4 page, leaving a small gap between them.
- Draw one or two writing lines below each box for the child's words.
- Label the boxes beginning, middle and end. For a child who does not know these words, add a small start, continue and finish symbol instead.
- Print the blank strip at Actual size, or 100 percent. You can also type the child's dictated words into the spaces before printing.
- Let your child colour the pictures or add a small detail after the story has been told.
A printable keeps the story in order and gives your child something to retell later at home or in class. If you want a different printable activity after the story, the photo to colouring page tool can turn a suitable family photograph into a colouring page, with adult help.
How can you adjust it for different children?
A child who is new to storytelling may need fewer choices. Offer two picture choices for each part and let the child select one. Accept one sentence, a phrase or even a few words. You can repeat the child's idea and add a connecting word without asking for a longer answer.
A child who speaks confidently can add a character, place, problem and ending. Ask, "Where are they?" or "What problem do they have?" Encourage details about size, colour, sound and feelings. For Nursery or younger children, pointing, acting and naming objects are useful ways to join in. The adult can supply words such as "then" and "because".
For LKG, UKG or older children, invite your child to draw an extra detail, give the story a title or change the ending. A Class 1 child might write one familiar word under each picture, while you write the rest. In a home or classroom, place children in pairs when they enjoy discussing pictures, but let each child tell their own version. There is no need for every child to produce the same story.
What mistakes should you avoid while helping?
Try not to correct every grammar mistake while your child is speaking. Listen for the meaning and write it clearly. If your child says, "He goed home," you can respond, "Yes, he went home," without stopping the story for a grammar lesson.
Avoid asking so many questions that the activity feels like a test. Follow your child's idea and ask one question at a time. A prompt such as "What happened next?" is often enough. Do not insist that every picture has a long sentence. A short sentence such as "The ball is lost" can move the story forward.
Keep unusual ideas and funny details that belong to your child. If the child says the rain is purple or the seed is sleeping, record the idea rather than replacing it with an adult's version. You can help with order and clear wording, but the story should still sound like your child. If your child loses interest, stop after two cards and return to the activity another day.
How can you use the story again?
Read the story the next day and ask your child to retell it before hearing your written version. Show the three cards, then let your child remember the words. It is fine if the new telling is different. Young children often add details after they have had time to think.
Mix up the cards and ask your child to put them back in order. Ask, "Why does this picture come first?" or "What tells us this is the ending?" The child can use the pictures to explain the order without needing to read the sentences.
Use the strip for a small home display or a class sharing activity. Let your child choose if they want to tell it to others. Try the activity again with familiar experiences, such as visiting a local park, buying fruit at a market or making chapatis with a family member. A story about something your child has seen may be easier to tell than an unfamiliar scene. You can keep the strip in a folder and read it during a quiet afternoon.
Questions parents ask
Can a 4-year-old make a story without knowing how to write?
Yes. Your child can tell the story aloud while you write the words. The pictures, spoken language and retelling matter more here than independent writing.
What should I do if my child gives only one-word answers?
Accept the words and expand them gently. If your child says "rain", you could say, "The child is walking in the rain," then ask, "What happens next?" You can also offer two choices or let your child act out the picture.
How do I write down my child's words without changing the story?
Listen for the meaning and keep the child's unusual ideas and details. You may tidy the grammar so the sentence is clear, but do not replace the child's idea with your own. Reading the sentence back gives your child a chance to add or change something.
Can I use family photos instead of picture cards?
Yes. Choose three photos that show connected events, such as preparing food, eating it and clearing the table. Ask permission before using photos in a class, and keep family images for your own home use unless everyone agrees.
How can I print a three-part story strip at home or in a classroom?
Draw three equal boxes with a line below each one, or make the boxes in a word processor. Print the page on A4 paper at Actual size, or 100 percent. You can type the child's dictated words before printing, or write them by hand afterwards.